
Best Zesty Garlic Dill Pickles with a Kick
If you’re a pickle enthusiast looking to spice up your condiment game, you’ll love these Best Zesty Garlic Dill Pickles with a Kick. Bursting with flavor and a delightful crunch, these pickles are perfect for snacking, sandwiches, and adding a zesty flair to your favorite dishes. With the perfect balance of garlic, dill, and just the right amount of heat, they will elevate any meal or occasion.
Key Takeaways:
- Preparation time: 20 minutes (plus 24 hours for pickling)
- Difficulty level: Easy
- Main ingredients: Cucumbers, garlic, dill, red pepper flakes, vinegar
- Special techniques: Quick pickling method, brining
- Storage information: Store in the refrigerator for up to 2 months
Introduction to Best Zesty Garlic Dill Pickles with a Kick:
Pickles have a long-standing history that dates back thousands of years, with origins believed to be in ancient Mesopotamia. The process of pickling, which involves preserving food in a brine or vinegar solution, was originally developed as a means to prolong the shelf life of vegetables and fruits, allowing them to be enjoyed long after the harvest season. Over the ages, pickling has evolved into an art form, with various cultures putting their unique spin on this preservation method.
In the United States, dill pickles have become a staple in many households, often associated with summer barbecues, picnics, and family gatherings. The addition of garlic and spices, particularly the kick of red pepper flakes, elevates the traditional dill pickle into a zesty, flavorful condiment that can enhance a wide range of dishes. These Best Zesty Garlic Dill Pickles with a Kick are not just a way to preserve cucumbers; they are a celebration of flavors that reflect the rich heritage of pickling.
Making your own pickles at home is not only rewarding but also allows you to customize flavors to your liking. The balance of garlic and dill, combined with a spicy twist, makes these pickles a standout choice for anyone who enjoys bold flavors.
Ingredients for Best Zesty Garlic Dill Pickles with a Kick:
- Cucumbers (3-4 medium-sized): The base of the pickles; choose firm, fresh cucumbers for the best crunch.
- Garlic (4-6 cloves): Adds a robust flavor and aromatic depth to the pickles.
- Fresh dill (1 bunch): Essential for that classic dill pickle flavor; fresh dill provides a vibrant taste.
- Water (2 cups): Used to create the brine.
- White vinegar (1 cup): Provides acidity for preservation and flavor.
- Sugar (1 tablespoon): Balances the acidity and enhances the overall flavor.
- Salt (2 tablespoons): Essential for seasoning and drawing moisture from the cucumbers.
- Red pepper flakes (1-2 teaspoons): Gives the pickles their desired kick; adjust to your spice preference.
- Mustard seeds (1 teaspoon, optional): Adds a subtle tang and complexity to the brine.
Preparation Steps for Best Zesty Garlic Dill Pickles with a Kick:
1. Prepare the cucumbers: Wash the cucumbers thoroughly under cold water. Slice them into quarters or spears, depending on your preference. If you prefer whole pickles, choose smaller cucumbers and keep them intact.
2. Make the brine: In a medium-sized saucepan, combine the water, white vinegar, sugar, salt, and red pepper flakes. Bring the mixture to a boil over medium heat, stirring until the sugar and salt are fully dissolved. Once boiling, remove from heat and let it cool slightly.
3. Prepare the jars: While the brine cools, prepare your storage jars. Sterilize the jars and lids by placing them in boiling water for a few minutes or running them through the dishwasher.
4. Layer the ingredients: In each jar, place a few cloves of peeled garlic, a generous bunch of fresh dill, and a pinch of mustard seeds (if using). Then, pack the cucumber spears tightly into the jars, leaving some space at the top.
5. Add the brine: Once the brine has cooled slightly, pour it over the cucumbers in the jars, ensuring they are fully submerged. Leave about ½ inch of headspace at the top of each jar.
6. Seal and refrigerate: Tightly seal the jars with their lids and let them cool to room temperature. Once cooled, place the jars in the refrigerator. Allow the pickles to marinate for at least 24 hours for the flavors to develop; however, they taste even better after a few days.
Flavor Profile of Best Zesty Garlic Dill Pickles with a Kick:
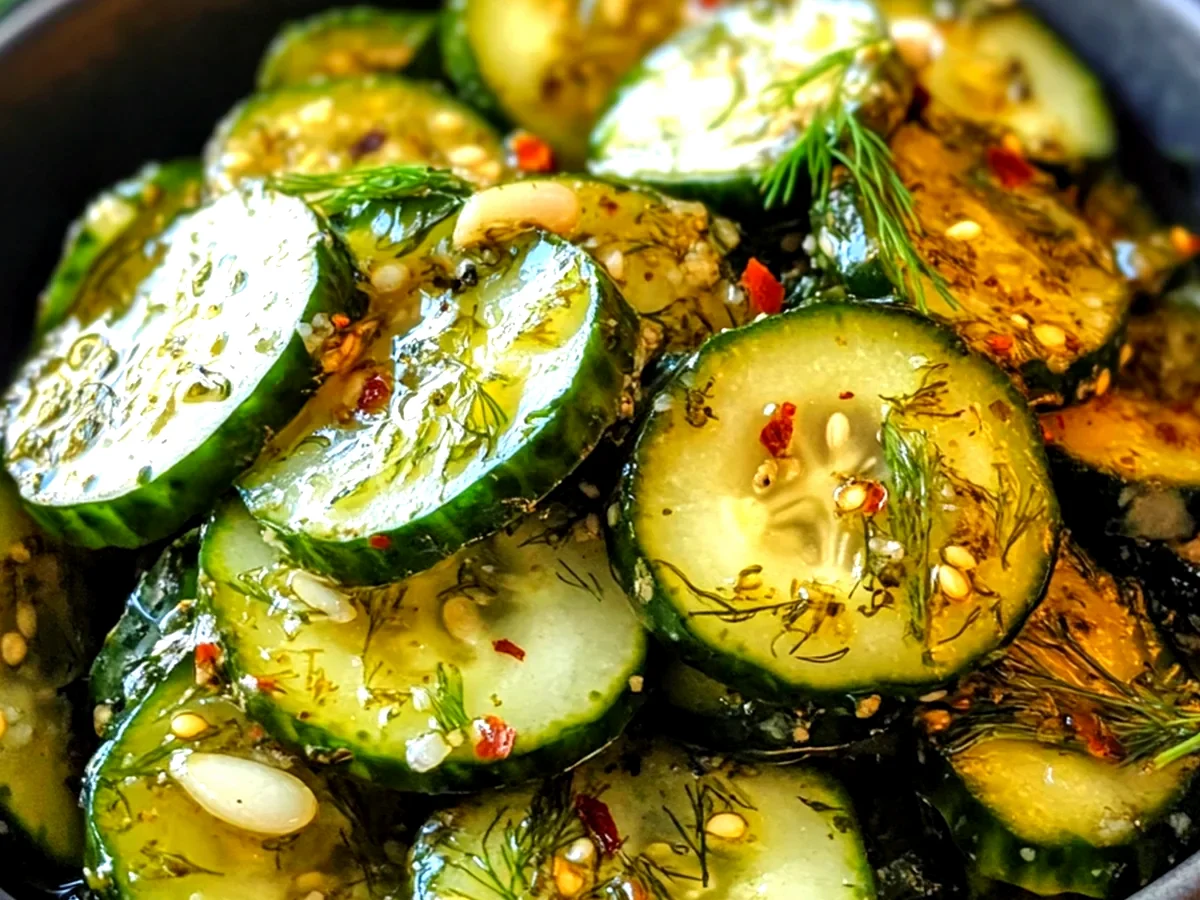
The Best Zesty Garlic Dill Pickles with a Kick present a harmonious blend of flavors that delight the palate. The crispness of the cucumbers provides a satisfying crunch, while the bold garlic infuses each bite with a savory depth. The fresh dill contributes a bright, herbaceous note that balances the acidity of the vinegar brine.
Adding red pepper flakes gives these pickles their signature kick, offering a gentle heat that lingers without overwhelming the other flavors. The sweetness from the sugar rounds out the brine, creating a well-balanced flavor profile that is both tangy and savory. Aromatically, these pickles are enticing, with the pungent scent of garlic mingling with the fresh, grassy notes of dill, making them irresistible.
Benefits of Best Zesty Garlic Dill Pickles with a Kick:
Not only are these pickles delicious, but they also offer several health benefits. Pickles are low in calories and can be a great addition to a healthy diet. The main ingredient, cucumbers, is hydrating and packed with vitamins K and C, as well as potassium.
Garlic is known for its numerous health benefits, including its antibacterial properties, potential heart health benefits, and ability to enhance the immune system. Dill is also a source of antioxidants and has been associated with digestive health. The fermentation process of pickling can introduce beneficial probiotics, which support gut health. Moreover, the vinegar used in the brine may help regulate blood sugar levels and aid in weight management.
Serving Suggestions for Best Zesty Garlic Dill Pickles with a Kick:
These zesty garlic dill pickles with a kick are incredibly versatile and can be served in various ways. They make a fantastic accompaniment to sandwiches, burgers, and hot dogs, adding a crunchy, tangy element that elevates the entire dish.
For a creative twist, chop the pickles and mix them into potato salad or coleslaw for added zest. They can also be served as part of a charcuterie board alongside cheeses, cured meats, and olives. If you’re looking for a unique snack, try pairing them with cream cheese on crackers or as a topping for nachos. The bold flavors of these pickles can enhance dips and spreads, making them a must-have for parties and gatherings.
Storage Tips for Best Zesty Garlic Dill Pickles with a Kick:
To ensure your Best Zesty Garlic Dill Pickles with a Kick stay fresh and delicious, proper storage is key. These pickles should be kept in the refrigerator, where they can last for up to two months. Always ensure the pickles are fully submerged in the brine to prevent spoilage.
If you notice any signs of mold or unusual odors, it’s best to discard the pickles. For long-term storage, consider canning them using a proper water bath canning method, which allows for shelf-stable pickles without refrigeration. However, this recipe is designed for quick refrigerator pickling, which is simpler and quicker for home cooks.
Conclusion:
In conclusion, the Best Zesty Garlic Dill Pickles with a Kick are a delightful way to enjoy the classic taste of pickles with an exciting twist. With just a few simple ingredients and steps, you can create a jar of these flavorful pickles that will impress your family and friends. Whether you enjoy them as a snack or as a zesty addition to your meals, these pickles are sure to become a favorite in your home. So why not give this recipe a try? Your taste buds will thank you!
FAQ Section:
1. How long do the pickles need to sit before they are ready to eat?
- It’s best to let the pickles marinate in the refrigerator for at least 24 hours, but they taste even better after a few days.
2. Can I use other types of cucumbers for this recipe?
- Yes, you can use any variety of cucumbers, but pickling cucumbers or Kirby cucumbers are ideal for their firmness and crunch.
3. How spicy are these pickles?
- The spiciness can be adjusted based on the amount of red pepper flakes you add. Start with a small amount and increase to your preference.
4. Can I can these pickles for long-term storage?
- Yes, you can use a water bath canning method to preserve them for shelf storage. However, this recipe is specifically for quick refrigerator pickles.
5. What can I do with leftover pickle brine?
- Leftover pickle brine can be used to marinate meats, add flavor to salad dressings, or even as a tangy addition to cocktails.
6. How should I clean the jars before using them?
- Sterilize the jars by boiling them in water for a few minutes or running them through the dishwasher on a hot cycle.
7. Are these pickles vegan?
- Yes, the ingredients in this recipe are plant-based, making these pickles suitable for a vegan diet.
8. What is the nutritional value of these pickles?
- These pickles are low in calories and provide various vitamins and minerals, along with the health benefits associated with garlic and vinegar.
Full Recipe
Crisp Spicy Garlic Dill Pickles with a Zing

Ingredients:
- 4 cups small cucumbers (Kirby or pickling cucumbers)
- 2 cups distilled white vinegar
- 1 cup water
- 1/4 cup kosher salt
- 4 cloves garlic, peeled and smashed
- 2 tablespoons dill seeds
- 1 tablespoon crushed red pepper flakes (adjust to taste)
- 1 tablespoon mustard seeds
- 1 teaspoon black peppercorns
- 1 teaspoon coriander seeds
- 4 sprigs fresh dill
- 1 tablespoon sugar (optional, for a hint of sweetness)
- 1/2 cup sliced jalapeños (fresh or pickled, to taste)

Instructions:

1. Begin by preparing your cucumbers. Wash them thoroughly and trim the ends. If desired, you can slice them into spears or leave them whole for a classic look.

2. In a large pot, combine the distilled white vinegar, water, and kosher salt. Heat over medium heat, stirring until the salt is fully dissolved. Remove from heat and let the brine cool slightly.

3. In sterilized quart-sized canning jars, layer the smashed garlic, dill seeds, crushed red pepper flakes, mustard seeds, black peppercorns, coriander seeds, and fresh dill sprigs evenly among the jars.

4. Add the sliced jalapeños to the jars, distributing them evenly. Pack the cucumbers tightly into the jars, leaving about half an inch of headspace at the top.

5. Pour the warm brine over the cucumbers, ensuring they are fully submerged. If using, add the sugar to each jar before sealing, stirring gently with a clean utensil to mix.

6. Wipe the rims of the jars with a clean cloth to remove any residue. Seal the jars with sterilized lids and bands.

7. Process the jars in a boiling water bath for 10-15 minutes to ensure proper sealing and preservation. Make sure the water covers the jars by at least an inch.

8. Once processed, remove the jars and let them cool completely on a clean towel or cooling rack. You should hear the lids pop as they seal.

Storage Instructions:
Store the sealed jars in a cool, dark place for at least 2 weeks to allow the flavors to develop. Once opened, refrigerate any unused portions.

Shelf Life:
When stored properly, these pickles can last for up to 1 year unopened. Once opened, consume within 2-3 months for the best flavor and texture. Enjoy your Crisp Spicy Garlic Dill Pickles with a Zing as a tangy snack, sandwich topping, or addition to your favorite charcuterie board!